Category Archives: Sweets

Classic French Madeleines

Classic French Madeleines

It seems like all I’ve been thinking about recently is France. I’ve bought a few books about living, eating and loving in Paris and have been inspired to go back. Do I even need to mention David Lebovitz’s blog? That’s an incentive to get on a long flight in itself! I began looking through photos of our last trip to Paris, which was actually part of our honeymoon tour, and I longed for the feeling of sitting outside a Patisserie and enjoying the little sweet treats in the summer sunshine. At this point I had two options: book a trip to Paris, or make something to make me feel Parisian in my own home. So what did I do? Both of course!

So I immediately booked a train for a weekend away at the end of May (WHOOO HOO!), unwrapped the Madeleine pans that my husband had given me for Christmas (he must have predicted this!) and I got cookin’. When making Classic French Madeleines, you need to prepare in advance and make sure you read the recipe at least twice before beginning. You need the correct equipment (two 12 hole madeleine tins) and also the time for this recipe, as the batter needs to rest in the fridge and you need to chill the pans in the freezer before baking.

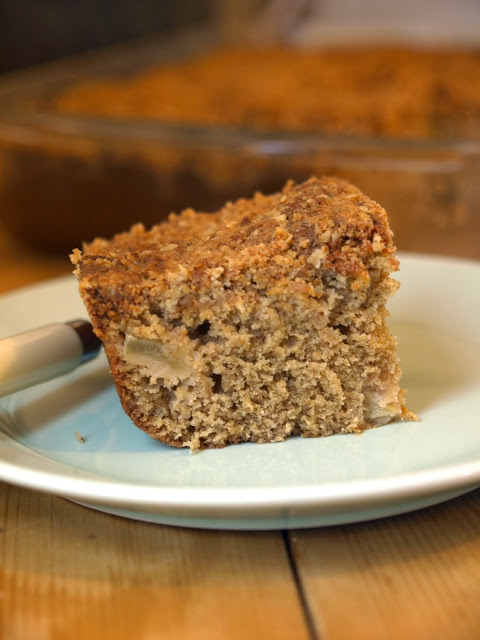
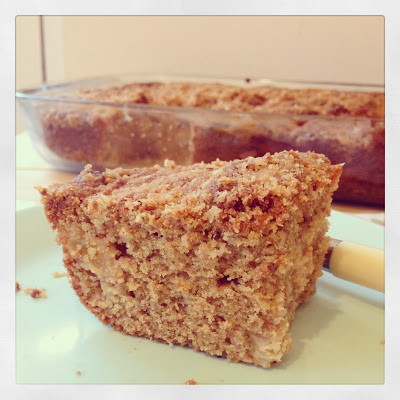
These little French cakes are almost more cookie than cake. They are like a delicate little sponge with a crisp biscuit like case. They are lemon and vanilla scented bites that will transport you straight to the cobbled back streets of Paris. These super cute cakelets are best enjoyed the day you’ve made them (trust me!) but if you are getting ahead and serving the next day, do not dust with the powdered sugar after baking, wait until just before serving to enjoy them at their best. They can be stored for a few days in an airtight container.

Aren’t they just the cutest little things you’ve ever seen? They would be the perfect thing to bring to a girlie brunch or for a little snack with a pot of tea or coffee. I need to explore more flavor combinations as an excuse to make lots of them! Continue reading

Chocolate Dipped Coconut Macaroons

Summer is in full swing now and I’ve been enjoying being outdoors a bit more. It’s just so much more enjoyable walking the dog in the sunshine and in my case, walking down by the river is amazing (except for all the bugs!). So as you’d expect, one of the last things I want to do at this time of year is have the oven on for hours on end. Yet, in order to keep myself sane, I do need to do a bit of baking. Some super simple Chocolate Dipped Coconut Macaroons? Done and done.

These little babies are delicious. The light, fluffy coconut clouds are dipped in a rich, bittersweet chocolate that has been melted slowly and speckled with sea salt. Then there’s the arty bit- go all Jackson Pollack after the bottoms have set and drizzle away! Who said baking isn’t fun? I’ve made these macaroons a few times before, but I thought dipping them in some slightly salted dark chocolate would elevate them to a whole new level of awesomeness! I mean, chocolate and coconut are one of those classic combinations that just belong together (Mounds or Almond Joy anyone?). If you are an Almond Joy fan, feel free to replace the vanilla extract with almond extract to get that flavor fix.

More importantly, make sure these little coconut clouds are completely cooled before dipping in the chocolate, or they can break apart. Also, that the chocolate has set before you pack them into an airtight container. Remember- watch these bad boys in the oven, they can go from perfect to disaster quite quickly in terms of browning. Be ready to impress anyone and everyone with these little dollops of indulgence!

Continue reading

Apple Cinnamon Streusel Cake

I can’t believe it’s that time of year again! The kitchen is filled with lovely smells and presents are stacking up under the tree- Christmas is here again. I’ve had a bit of a nagging cough over the last few weeks, which seems to get better then come back with a vengeance every so often. So I’ve done a bit of comfort baking, and what is more comforting during the holidays than apples and cinnamon? For me, it’s not candy canes or gingerbread men- that’s the ultimate sign of the holidays.
They say that an apple a day keeps the doctor away, right? Well in that case- I want to enjoy my apples in other ways than just straight out of the fruit basket. This cake is my idea of heaven. Soft and crumbly because of the tart apples with a bit of crunch from the streusel topping and heaps of cinnamon! It kind of reminds me of a cake version of Apples & Cinnamon Oatmeal- a perfect excuse to eat cake for breakfast if you ask me!
When choosing your apple- think about what little pops of flavor you want in your cake. Tart and tangy like a Granny Smith? Or sweet and fruity like a Golden Delicious? Or a mix of your favorites! It doesn’t matter really, so use whatever suits your tastes.
Enjoy the holidays everyone! Go bake someone happy! Xxx

Salted Rocky Road Fudge

I love marshmallows. I think I would have them every day if I could. They’re just so nostalgic, they truly take you back to being a child again. The sticky sweetness, the mess when they’re melted and the lighter than air texture that just melts when it touches your tongue. Be it S’mores, Krispie Treats or this delightful salted fudge, the marshmallow is the glue that holds these treats together, both literally and figuratively.

This fudge is delicious. There are some great textures from the crunch of the whole almonds, the gooeyness of the marshmallows and the creaminess of the fudge and it’s almost the perfect bite. Just sprinkle in a pinch of salt and voila! Perfection.

It also lasts for a week at room temperature (not that it will be around that long), so it makes a fantastic, thoughtful homemade gift for the holidays. Imagine being sat by the fire, passing around a beautiful vintage cake tin chock full of this stuff. People will think you’ve slaved in the kitchen for hours! Let them think it… you deserve it! Happy Holidays!

Salted Rocky Road Fudge adapted from Always Order Dessert
Makes about 3 dozen squares


14oz good quality dark chocolate, I used 76%
14oz (1 can) sweetened condensed milk
2 tablespoons butter
1 tsp vanilla extract
1 tsp Kosher salt
2 cups miniature marshmallows (I used a pink and white mix)
1 1/2 cups roasted salted almonds, whole

Grease bottom and sides of a 9 inch square baking pan with butter and line with a long sheet of parchment paper that overlaps the sides. Set aside.

In a medium sized saucepan, combine the chocolate, the condensed milk, and the butter. Set over medium-low heat, and stir until the chocolate is melted. Remove pan from the heat.* Add the extract and salt and keep stirring. Allow mixture to cool slightly (just a minute or two) and then fold in the marshmallows and almonds.

*If you keep the pan on the heat, you run the risk of the marshmallows melting and not staying whole. Letting the mixture cool slightly helps them keep their shape.

Pour the warm mixture into the prepared baking pan and spread evenly. Use the back of a metal spoon greased with butter to press down if needed.

Cover with a sheet of parchment paper and let chill in the fridge for 2 hours.


Remove from fridge and lift parchment paper to remove from pan. Use a sharp knife to cut into desired-sized portions before serving. Can be stored in an air-tight container at (cool) room temperature for 7-10 days.


Super Easy Nutella Brownies


I have been super stressed the past few weeks. I have taken on more responsibility, and that means less baking. Not a good equation for a girl who has just received the birthday gift of her dreams. Oh well, I guess I need a new equation.

STRESS = BROWNIES (Sounds good doesn’t it?)

I love a good brownie. A good, fudgy, chocolatey brownie. Not a cake-like brownie. A dense, gooey, rich brownie that melts in your mouth. I don’t have brownies too often, because I fear that if I did I would (gasp!) get sick of them. I know it sounds crazy. Fortunately, these brownies are so delicious and SO easy that the fear of ever losing interest in the beloved brownie vanished into thin air.

My colleagues were begging me for this recipe by the end of the day. I truly enjoyed the look of shock when I told them how easy they were to make! Enough talk, go whip some of these babies up! Perfect Sunday afternoon snack with a big glass of ice cold milk…


Super Easy Nutella Brownies
Makes 24


2 cups Nutella
4 eggs
1 1/4 cups all purpose flour
1/2 tsp salt
1/2 cup chocolate chips

Preheat oven to 350º F. Grease a 9 x 13 inch baking tin.


Mix together eggs and Nutella in a medium bowl until smooth. Add in flour, salt and half the chocolate chips and mix until just combined. Evenly spread into prepared tin. Sprinkle with remaining chocolate chips.


Bake 20-25 minutes, depending on how gooey you like your brownies. The edges of the brownies should start to come away from the sides of the tin.

Pumpkin Spice Rice Krispie Treats

Every year, when November hits I start to get excited for Thanksgiving. Unfortunately, living in Britain, they don’t get the amazingness of Thanksgiving (or are just slightly bitter!). But the constant feed of pumpkin-filled treats on Pinterest sometimes leaves me feeling so left out. And hungry. So I decided I needed a pumpkin spiced fix, and fast. So I decided on these Rice Krispie Treats to hold me over until I could get my hands on more canned pumpkin (you’d be surprised how difficult it is here! I told you, they just don’t get it!). I remember the reaction of my co-workers the first time I brought in pumpkin bread. “Pumpkin?!?!? Shouldn’t that be in ravioli or something?” Yes, pumpkin. And ravioili? Pshhhhhh. Autumn is the best and most delicious time of the year because of the pumpkin.

By the way, I’m so excited to paticipate in the 2nd Annual Food Blogger Cookie Swap. You bake a dozen cookies for three other food bloggers, package them up all pretty and send them over! I can’t say that I’m hating the fact that I will receive three dozen cookies from three other food bloggers. Very excited to swap with my matches! And the count down starts… now!

Pumpkin Spice Rice Krispie Treats recipe from The Kitchn

Makes 12-16, depending on how greedy your squares are!
3 tablespoons unsalted butter

1/4 cup canned pumpkin puree

1 (10 ounce) bag mini marshmallows plus one cup

1/4 teaspoon pure vanilla extract

1/4 teaspoon ground cinnamon

Pinch of allspice

Pinch of freshly grated nutmeg

Pinch of kosher salt

6 cups crispy rice cereal
Butter a 9×13-inch baking dish (or a smaller dish — see Note below).
In a heavy saucepan or Dutch oven, melt butter over medium-low heat. Add the pumpkin puree and continue to cook until it is warmed through. Fold in 10 ounces of the marshmallows, stirring frequently until almost completely melted. Stir in vanilla, cinnamon, allspice, nutmeg, and salt, and remove from heat.
Allow the marshmallow mixture to cool 10 minutes; fold in the remaining cup of marshmallows. Continue to cool the mixture for another 20 to 25 minutes until it is room temperature (failure to cool the mixture will result in soggy rice crispy treats.) Add the puffed rice cereal and stir, using a silicone spatula, until combined.
Press the mixture into the greased rectangular baking dish. Let set for 30 minutes before cutting and serving.

Note: I used a 9×9 square baking pan. This gave me squares with a little more height, which I love. Use a pan that meets your Krispie Treat criteria.

Coconut & Lime Bars


“She put the lime in the coconut and she drank ’em both up.” -Harry Nillson

I guess I’m having a bit of trouble letting go of summer. I got married in August and spent the early summer months planning. While it will probably be written in the history books as the best summer of my life, I still feel like I missed out on the classic relaxing by the pool summer I’m so used to. So now, back in not-so-sunny ol’ England and missing the long summer days, I needed something to take me back to the sunshine, if only in a bite or two or three. Now I just wish I had some kind of cocktail with an umbrella in it!

Back to reality. These bars are the perfect twist on the classic Lemon Bar. They are tart yet sweet and the coconut that is baked into the crust and piled on top of the chartreuse custard gives an earthy flavor that leaves your mouth wanting more and more! Believe me, they should actually be called ‘Houdini Bars’ as they disappear right before your eyes! Magical citrus goodness.

Coconut & Lime Bars Adapted slightly from Epicurious
Makes one 9×13 pan, about 32 squares


For the crust:
1 1/2 cups all-purpose flour
12 tbsp cold unsalted butter, cut into bits
2/3 cup sweetened flaked coconut, toasted and cooled
1/2 cup confectioners’ sugar
1/2 tsp salt

For the custard:
8 large eggs
2 cups granulated sugar
2/3 cup all-purpose flour
1 cup fresh lime juice, from about 10 limes
2 tbsp freshly grated lime zest, from about 4 limes
2/3 cup sweetened flaked coconut, toasted and cooled
Lime green food coloring (optional)


Make crust:
Preheat oven to 325°F. and butter and flour an 9×13 inch baking pan, knocking out excess flour.

In a bowl blend together with fingertips flour, butter, coconut, confectioners’ sugar, and salt until mixture resembles coarse meal. Pat mixture into prepared pan and bake in middle of oven 25 to 30 minutes, or until golden brown. Reduce oven temperature to 300°F.

Make custard:
In a bowl whisk together eggs and granulated sugar until combined well and stir in flour, lime juice, and zest. Add lime green food coloring to achieve desired limey color if desired.

Pour mixture over crust and bake in middle of oven 20 minutes. Top custard with coconut and bake 5 to 10 minutes more, or until just set. Cool confection in pan on a rack and chill 1 hour.